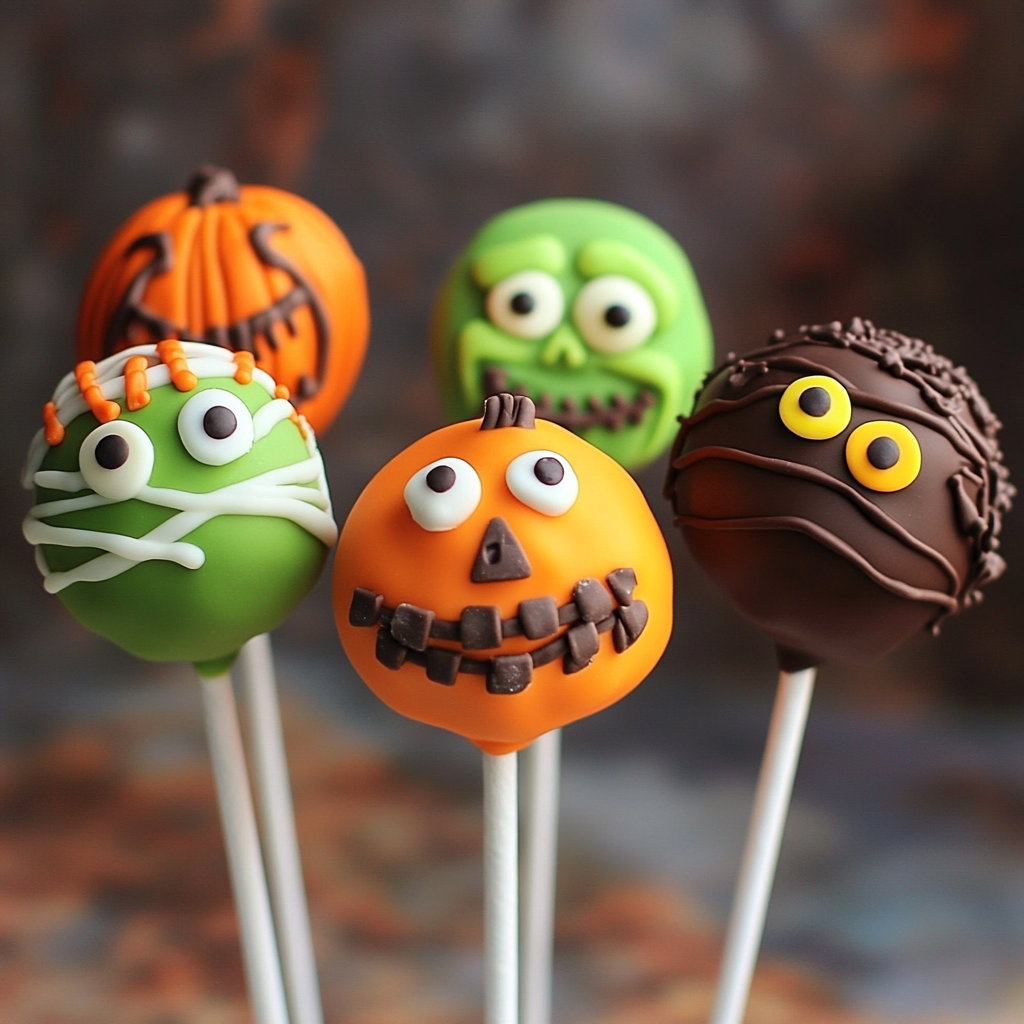
Add these spooky cake pops to your next Halloween party. Made with vanilla or chocolate cake, these bite-sized pieces of joy are perfect for Halloween festivities. You can decorate them as a Pumpkin, Frankenstein, or a Mummy, making them fun and visually appealing for both kids and adults alike. These Halloween Cake Pops are not only delightful but also versatile, ensuring they fit seamlessly into any celebration!
Why You’ll Love This Recipe
- Fun for Everyone: Halloween Cake Pops are a hit with kids and adults alike, making them the perfect treat for parties.
- Customizable Decorations: Get creative with your toppings! Use different sprinkles or candy eyes to make each pop unique.
- Easy to Make: With simple ingredients and straightforward steps, these cake pops are easy enough for beginner bakers.
- Perfect for Any Occasion: While they shine at Halloween parties, these cake pops can be adapted for birthdays and other celebrations.
- Deliciously Decadent: Rich flavors from the cake and frosting combine with sweet melted candy for an irresistible treat.
Tools and Preparation
Before diving into the deliciousness of Halloween Cake Pops, ensure you have the right tools on hand. Having everything prepared will streamline your baking process.
Essential Tools and Equipment
- Mixing bowl
- Electric mixer
- 13 x 9 inch baking pan
- Cookie sheet
- Parchment paper
- Microwave-safe bowl
Importance of Each Tool
- Electric mixer: Saves time and effort when mixing batter evenly; ensures a smooth consistency.
- Baking pan: A good-quality pan ensures even baking and prevents sticking.
- Parchment paper: Lining your cookie sheet helps prevent messes and makes for easier clean-up.
Ingredients
Add these spooky cake pops to your next Halloween party. Made with vanilla or chocolate cake, decorate these bite-sized pieces of cake for Halloween including a Pumpkin, Frankenstein, and a Mummy.
For the Cake Mix
- 1 box Favorite cake mix
- 1 3.4 oz box instant pudding mix
- 4 eggs
- 1 cup water
- 1/3 cup vegetable oil
For Assembly
- 1 cup Frosting
- Candy Melts
- Toppings – sprinkles, candy eyes
How to Make Halloween Cake Pops
Step 1: Preheat the Oven
Preheat your oven to 350°F. Spray your 13 x 9 pan with vegetable pan spray to prevent sticking.
Step 2: Prepare the Batter
In a large bowl, combine the following:
1. Cake mix
2. Pudding mix
3. Eggs
4. Water
5. Vegetable oil
Beat at medium speed for about 2 minutes until well mixed. Pour into the lightly greased cake pan.
Step 3: Bake the Cake
Bake in the preheated oven for 30-40 minutes or until a toothpick inserted in the center comes out clean. Allow cooling in the pan for about 10 minutes before transferring it to a wire rack.
Step 4: Crumble the Cake
Once cooled, crumble the cake in a large bowl using your hands until no large chunks remain. You can use two forks if preferred.
Step 5: Mix with Frosting
Add frosting to the crumbled cake mixture. Using your fingers, mix until well combined.
Step 6: Form Cake Balls
Roll the mixture into small balls (about one inch in diameter). Place them on a cookie sheet lined with parchment paper.
Step 7: Chill the Cake Balls
Refrigerate the formed balls for at least two hours to let them harden properly.
Step 8: Melt Candy Melts
Melt Candy Melts in a microwave-safe bowl in 30-second intervals at 50% power until fully melted (or use a stovetop).
Step 9: Insert Sticks
Dip sticks into melted Candy Melts about an inch deep, then insert into each chilled cake ball. Let set and place in freezer if needed (about 20 minutes).
Step 10: Dip in Candy Coating
Wait until candy is completely firm before dipping each pop fully into melted Candy Melts.
Step 11: Add Decorations
Sprinkle on your chosen decorations such as chopped-up candy or nuts while the coating is still soft. Enjoy creating fun designs!
How to Serve Halloween Cake Pops
Serve these delightful Halloween cake pops as a fun and festive dessert at your next gathering. Their colorful decorations and playful designs make them a hit among guests of all ages.
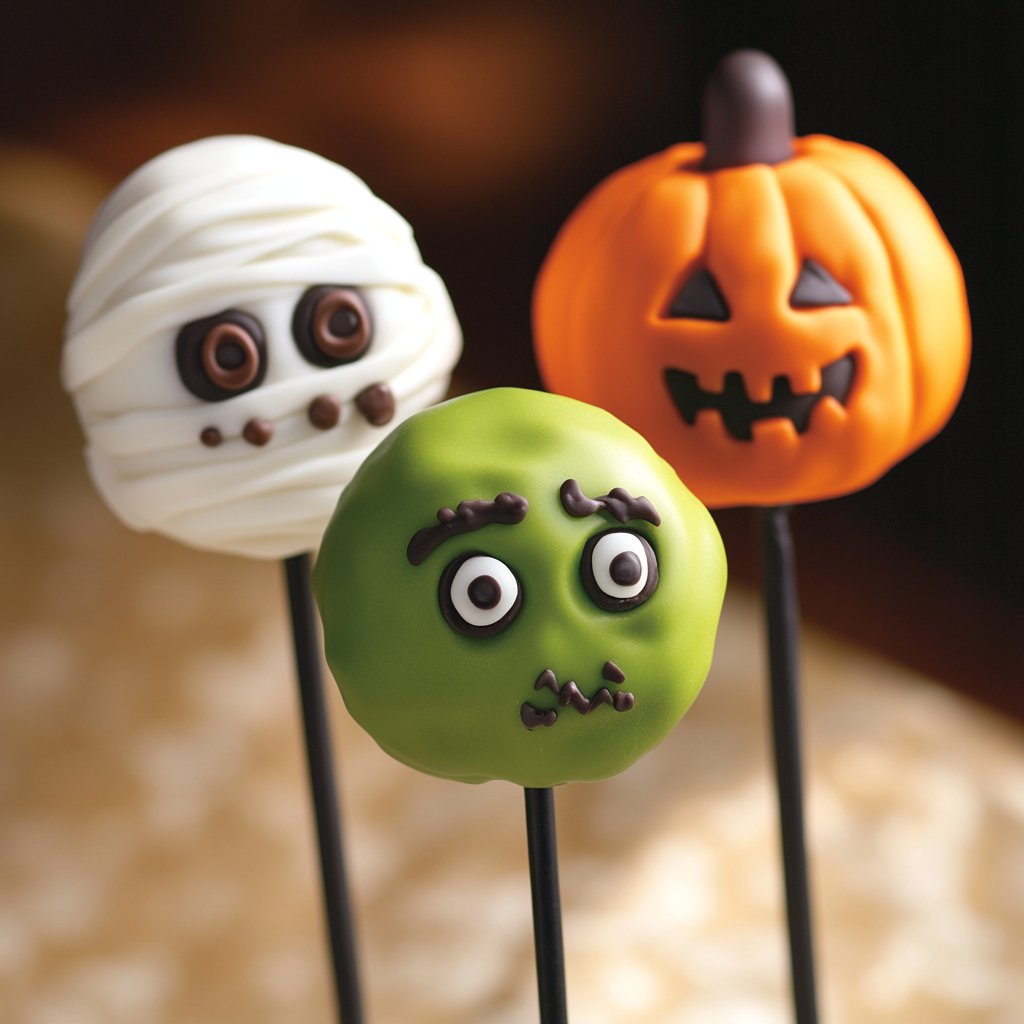
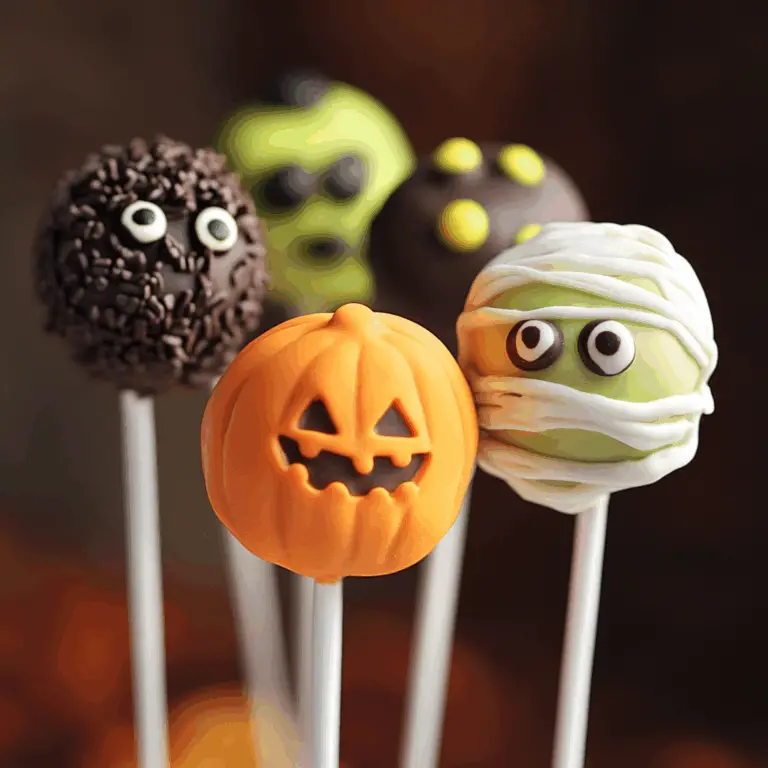
For a Spooky Display
- Pumpkin Pops: Shape cake balls into pumpkins and use orange candy melts with green sprinkles for the stems.
- Frankenstein Pops: Decorate with green candy melts, black chocolate drizzle for hair, and candy eyes to create the iconic monster.
- Mummy Pops: Wrap white melted chocolate around cake balls, leaving small gaps for candy eyes to peek through.
As Party Favors
- Individual Treat Bags: Place each cake pop in a clear bag tied with a Halloween-themed ribbon for guests to take home.
- Halloween Dessert Table: Arrange cake pops on a tiered stand among other spooky treats like ghost cupcakes and witch hat cookies.
Pairing with Beverages
- Spooky Punch: Serve with a refreshing fruit punch that complements the sweetness of the cake pops.
- Hot Chocolate Bar: Create a cozy drink station where guests can enjoy hot chocolate alongside their cake pops.
How to Perfect Halloween Cake Pops
Creating perfect Halloween cake pops takes practice and attention to detail. Follow these tips to elevate your treats.
- Use Quality Ingredients: Start with a good-quality cake mix and frosting for better flavor and texture.
- Crumb the Cake Well: Ensure there are no large chunks in your crumbled cake mix; it helps in forming smooth balls.
- Chill Before Dipping: Firmly chilling the cake balls makes them easier to dip in melted candy melts without falling apart.
- Maintain Candy Melt Temperature: Keep melted candy at the right temperature by reheating as needed; this ensures a smooth coating.
- Experiment with Decorations: Get creative! Use various toppings like edible glitter or themed candies to enhance your spooky designs.
- Practice Dipping Technique: Dip quickly but gently; let excess candy melt drip off before setting on parchment paper.
Best Side Dishes for Halloween Cake Pops
Complement your Halloween cake pops with these delightful side dishes that add variety to your dessert table.
- Ghostly Marshmallow Treats: These rice cereal treats shaped like ghosts are easy to make and fun to eat.
- Witch Hat Cookies: Chocolate cookies topped with Hershey’s Kisses create adorable witch hats that pair nicely with cake pops.
- Spider Deviled Eggs: Classic deviled eggs decorated with olive spiders make for a creepy but tasty addition.
- Monster Fruit Cups: Layer colorful fruits in cups, using yogurt as monster slime for an eye-catching display.
- Pumpkin Patch Dip: A sweet pumpkin-flavored dip served with graham crackers provides a seasonal twist.
- Creepy Veggie Platter: Arrange veggies in spooky shapes or faces, served with a delicious dip for healthy snacking.
- Caramel Apple Bites: Bite-sized apples coated in caramel offer a sweet contrast to the rich flavors of cake pops.
- Cheesy Mummy Puffs: Puff pastry wrapped around cheese sticks, baked until golden—perfectly spooky and savory!
Common Mistakes to Avoid
Creating Halloween Cake Pops can be fun, but there are common pitfalls to steer clear of for the best results.
- Bold Preparation: Not preparing your workspace and ingredients can lead to chaos. Ensure you have everything measured and ready before starting.
- Bold Over Mixing: Mixing too long can result in a dense cake mixture. Mix just until combined for a light texture.
- Bold Incorrect Cooling: Skipping the cooling step can lead to melted frosting. Always allow the cake to cool completely before crumbling.
- Bold Incomplete Chilling: Not chilling the cake balls enough can cause them to fall apart when dipped. Chill for at least 2 hours for best results.
- Bold Improper Dipping: Dipping in too hot Candy Melts can cause the cake pops to break. Allow the melts to cool slightly before dipping.
Storage & Reheating Instructions
Refrigerator Storage
- Store in an airtight container for up to 5 days.
- Place parchment paper between layers if stacking.
Freezing Halloween Cake Pops
- Wrap each cake pop tightly in plastic wrap before placing in a freezer-safe bag.
- They can be frozen for up to 3 months without losing flavor.
Reheating Halloween Cake Pops
- Bold Oven: Preheat to 300°F and warm cake pops for about 5 minutes until slightly softened.
- Bold Microwave: Use a microwave-safe plate, heat on low power for 10-15 seconds at a time.
- Bold Stovetop: Not recommended, as it may ruin the decorations.
Frequently Asked Questions
Here are some common questions about making Halloween Cake Pops.
What is the best cake mix for Halloween Cake Pops?
Using a standard vanilla or chocolate cake mix works well. You can also try spice or pumpkin mixes for a festive flavor!
How do I make my Halloween Cake Pops look spooky?
Decorate with colored Candy Melts, sprinkles, and candy eyes. Get creative with designs like mummies or Frankenstein!
Can I use other types of frosting?
Yes! Cream cheese frosting or whipped frosting can also be delicious alternatives that add different flavors.
How long do Halloween Cake Pops last?
When stored properly, they typically last up to 5 days in the fridge and about 3 months in the freezer.
Are there any vegan options for these cake pops?
You can substitute eggs with applesauce or flaxseed meal and use plant-based frosting to make them vegan-friendly.
Final Thoughts
Halloween Cake Pops are an exciting treat that brings joy to any celebration. With endless customization options—from flavors to decorations—these delightful bites are sure to impress your guests. Don’t hesitate to try different designs and toppings!
Halloween Cake Pops
Delight your guests with spooky Halloween Cake Pops! Easy-to-make treats perfect for any Halloween gathering. Try them today!
- Total Time: 1 hour
- Yield: Approximately 24 servings 1x
Ingredients
- 1 box favorite cake mix
- 1 3.4 oz box instant pudding mix
- 4 eggs
- 1 cup water
- 1/3 cup vegetable oil
- 1 cup frosting
- Candy melts
- Toppings like sprinkles or candy eyes
Instructions
- Preheat oven to 350°F and grease a 13 x 9 inch baking pan.
- In a large bowl, mix cake mix, pudding mix, eggs, water, and vegetable oil until smooth.
- Pour batter into prepared pan and bake for 30-40 minutes or until a toothpick comes out clean. Cool for 10 minutes before transferring to a wire rack.
- Once cooled, crumble the cake into fine pieces in a large bowl.
- Add frosting to the crumbled cake and mix until combined.
- Roll mixture into one-inch balls and place on a parchment-lined cookie sheet.
- Chill for at least two hours in the refrigerator.
- Melt candy melts according to package instructions.
- Dip sticks into melted candy and insert them into chilled cake balls; set in freezer for about 20 minutes.
- Dip each pop fully into melted candy and decorate as desired before the coating sets.
- Prep Time: 20 minutes
- Cook Time: 40 minutes
- Category: Dessert
- Method: Baking
- Cuisine: American
Nutrition
- Serving Size: 1 cake pop (45g)
- Calories: 150
- Sugar: 15g
- Sodium: 60mg
- Fat: 7g
- Saturated Fat: 2g
- Unsaturated Fat: 4g
- Trans Fat: 0g
- Carbohydrates: 20g
- Fiber: 0g
- Protein: 2g
- Cholesterol: 35mg
Keywords: Experiment with different flavors of cake mix or pudding to create unique variations. For a vegan option, substitute eggs with applesauce and use plant-based frosting.