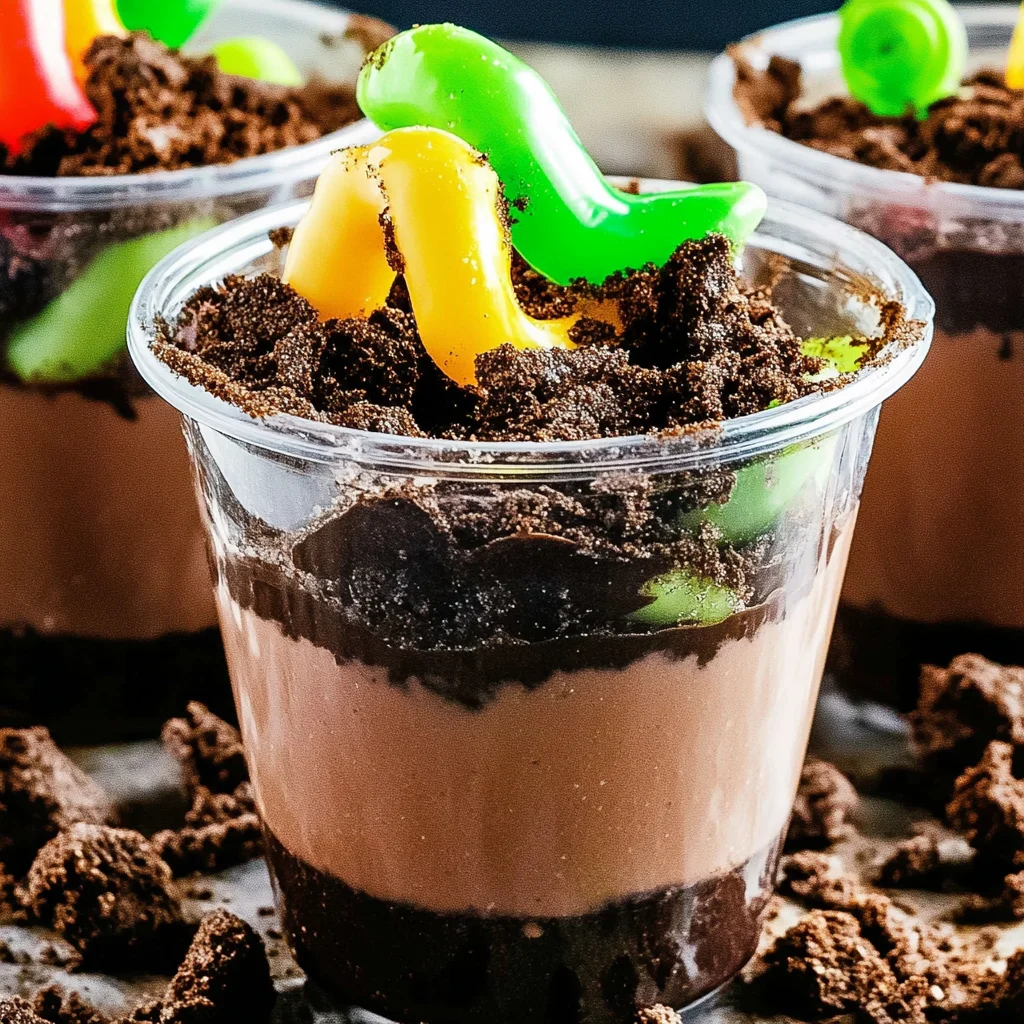
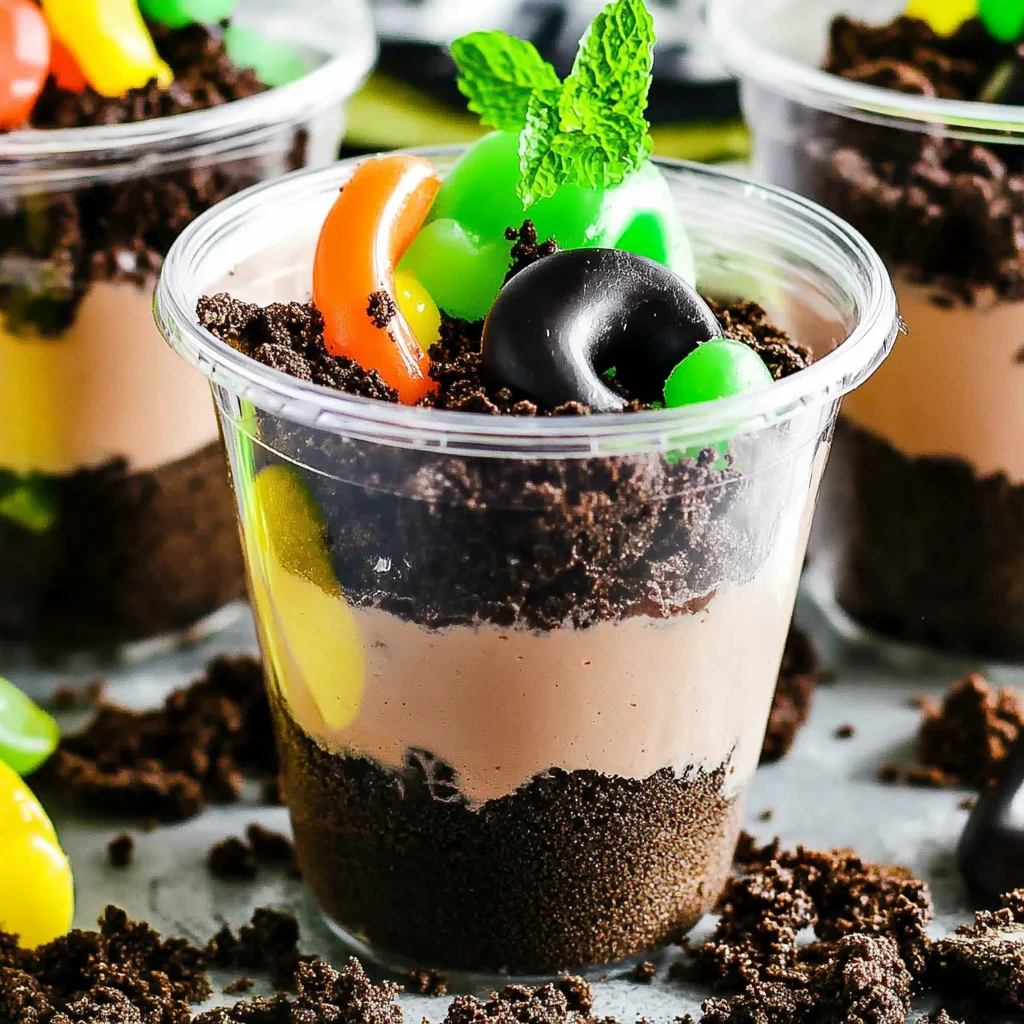
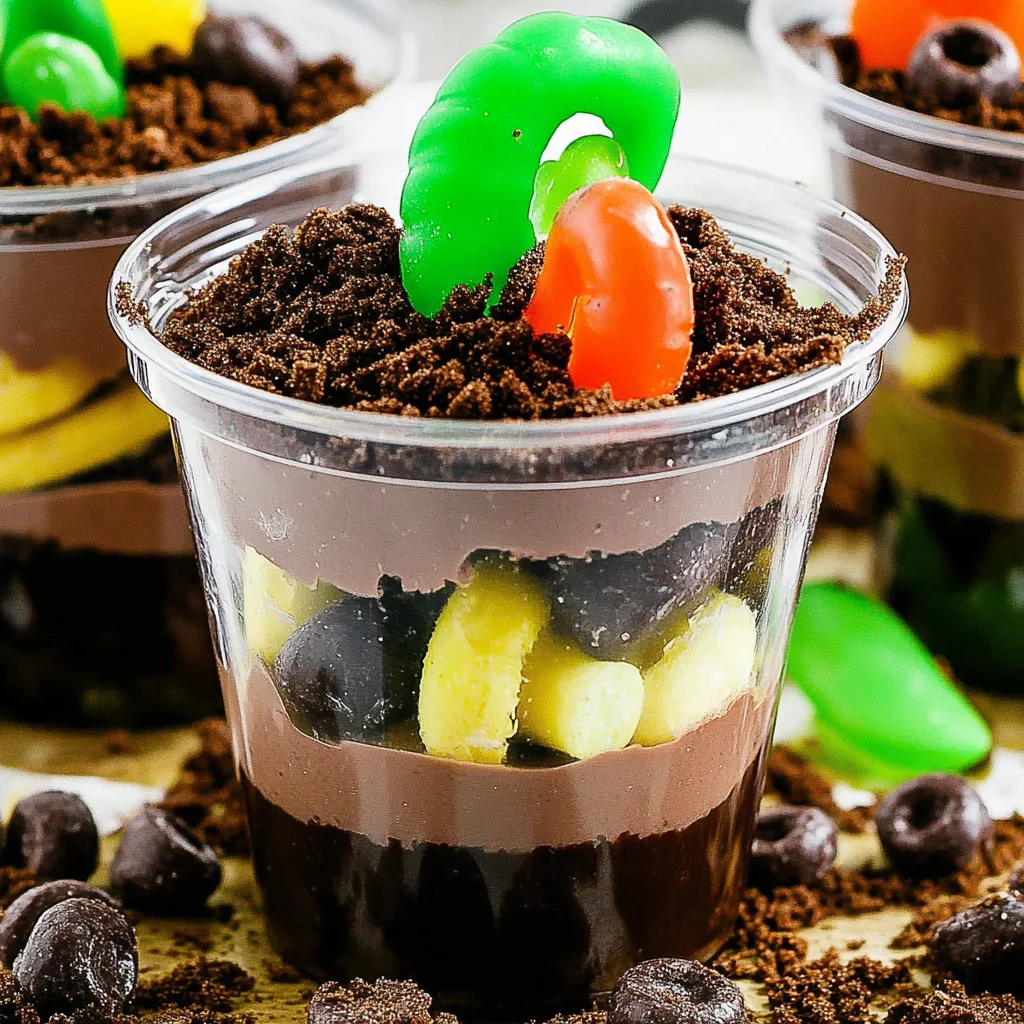
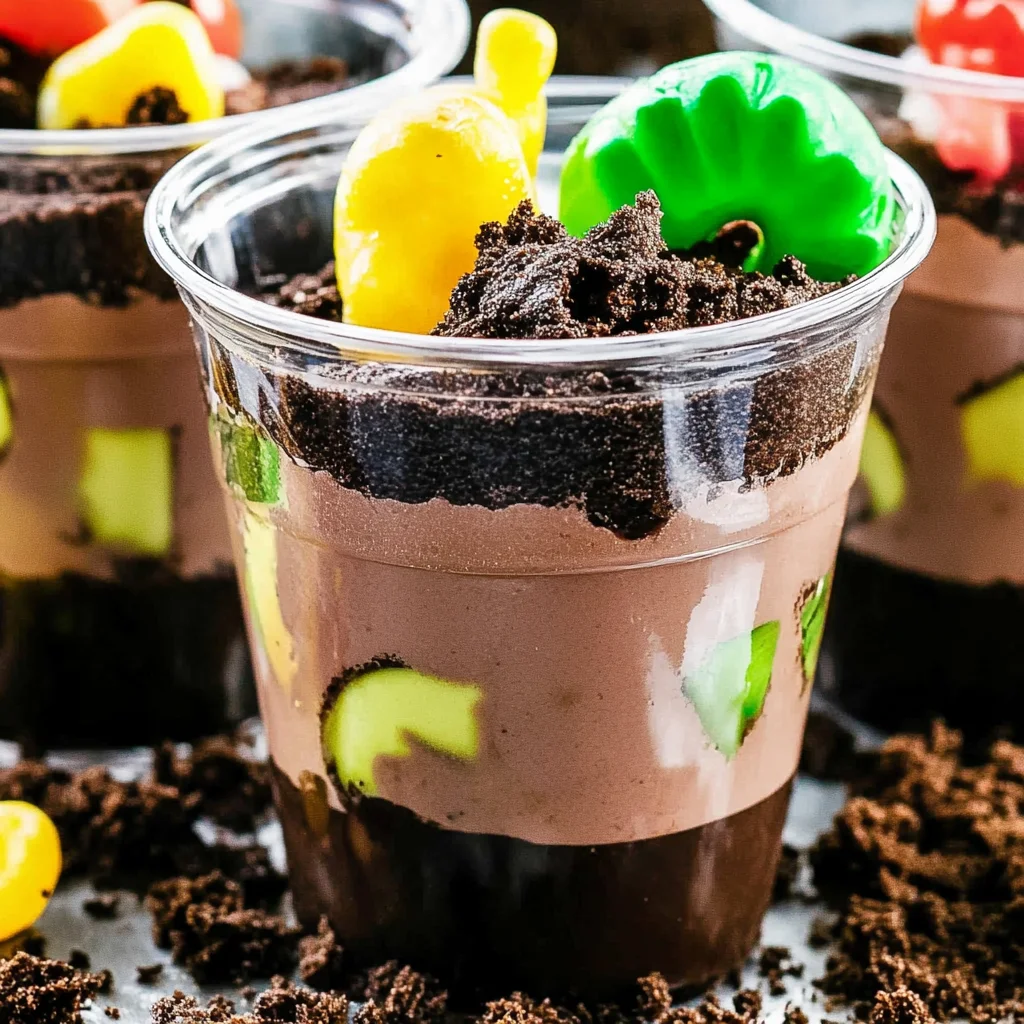
Layers of chocolate pudding, crushed Oreos topped with gummy worms make Dirt Cups a fun and unique dessert. Perfect for kids’ parties, Halloween, or any playful gathering, these treats are easy to assemble and offer a delightful mix of flavors and textures. The combination of creamy pudding, crunchy cookies, and chewy gummy worms is sure to be a hit for both kids and adults alike!
Why You’ll Love This Recipe
- Quick to Prepare: With just a few simple steps, you can whip up these delicious cups in under 10 minutes!
- Fun Presentation: The visual appeal of these layers makes them perfect for festive occasions.
- Customizable Treats: Feel free to switch out the gummy worms for other candies or add additional toppings.
- Kid-Friendly Recipe: Kids love getting involved in the kitchen with this hands-on dessert that lets them add their favorite elements.
Tools and Preparation
To create your Dirt Cups, you’ll need some essential tools that make the process easier and more efficient.
Essential Tools and Equipment
- Mixing bowl
- Whisk
- Glasses or cups for serving
- Spoon for layering
Importance of Each Tool
- Mixing bowl: A spacious bowl allows you to easily combine all ingredients without making a mess.
- Whisk: This tool helps achieve a smooth pudding texture by breaking up any lumps in the mix.
Ingredients
Layers of chocolate pudding, crushed Oreos topped with gummy worms!
For the Pudding Base
- 3.4 ounces box instant chocolate pudding mix
- 2 cups milk
- 8 ounces whipped topping (thawed)
For the Crunchy Layer
- 10-12 Oreo cookies (crushed)
For the Fun Topping
- 32 gummy worms
How to Make Dirt Cups
Step 1: Prepare the Pudding Mixture
In a medium bowl, add cold milk and sprinkle pudding over top. Whisk until well combined.
Step 2: Let it Thicken
Allow the mixture to sit for about 5 minutes so it can thicken properly.
Step 3: Fold in Whipped Topping
Gently fold in the thawed whipped topping until everything is well combined. This will give your pudding a light and airy texture.
Step 4: Spoon into Serving Cups
Spoon the pudding mixture into glasses or cups, filling each one about halfway.
Step 5: Add Oreo Crust
Sprinkle crushed Oreo cookies on top of the pudding layer in each cup, creating a dirt layer.
Step 6: Top with Gummy Worms
Add four gummy worms on top of each cup as a fun garnish.
Step 7: Chill Until Ready to Serve
Refrigerate your dirt cups until you’re ready to serve them. Enjoy this fun dessert at your next gathering!
How to Serve Dirt Cups
Dirt Cups are not just delicious; they are also fun and versatile! You can serve them in various ways to make your dessert even more enjoyable. Here are some creative serving suggestions that will impress your guests.
Individual Glasses
- Serving your Dirt Cups in clear glasses allows guests to see the layers, enhancing their visual appeal. Use small parfait glasses for a charming presentation.
Group Dessert Bowl
- For a casual gathering, consider making a large bowl of Dirt Cups. Guests can help themselves, making it perfect for parties or family gatherings.
Themed Party Favors
- Create mini Dirt Cups in small cups as party favors for a birthday or Halloween celebration. Tie them with a ribbon for a cute touch!
Layered Parfaits
- Alternate layers of pudding, whipped topping, and Oreos in tall glasses for an elegant look. This version is great for serving at dinners.
Kid-Friendly Options
- Use fun and colorful plastic cups with cartoon characters for kids. They will love the playful presentation!
How to Perfect Dirt Cups
To ensure your Dirt Cups turn out perfectly every time, keep these tips in mind:
- Use cold milk – Cold milk helps the pudding mix thicken properly and results in a creamier texture.
- Don’t rush the thickening – Allow the pudding mixture to sit for at least 5 minutes to reach the right consistency before adding whipped topping.
- Gently fold – When mixing in whipped topping, gently fold it into the pudding to maintain its light and airy texture.
- Crush Oreos well – Ensure Oreos are finely crushed for an even spread on top of the pudding. This creates a better dirt effect!
- Chill before serving – Refrigerate your Dirt Cups until ready to serve; this enhances their taste and texture.
Best Side Dishes for Dirt Cups
While Dirt Cups are delightful on their own, pairing them with complementary side dishes can elevate your dessert experience. Here are some great options:
- Fruit Salad – A fresh fruit salad adds a refreshing contrast to the rich chocolate flavors of Dirt Cups.
- Chocolate Chip Cookies – Classic cookies provide a satisfying crunch alongside the creamy layers of dessert.
- Ice Cream – A scoop of vanilla or mint chocolate chip ice cream pairs beautifully with the earthy tones of Dirt Cups.
- Brownie Bites – Rich brownie bites add another layer of chocolatey goodness that everyone will love.
- Mini Cupcakes – Serve small cupcakes as a sweet treat that matches well with the theme of fun desserts.
- Marshmallow Treats – Light and chewy marshmallow treats offer a whimsical touch when served alongside Dirt Cups.
- Candy Mix – A mix of gummy candies or chocolate treats complements the gummy worms in your dessert.
- Cheese Platter – A savory cheese platter balances out the sweetness from your dirt cups, providing a well-rounded dessert table experience.
Common Mistakes to Avoid
Making Dirt Cups can be a fun and delicious experience, but some common mistakes can ruin the fun. Here are a few to watch out for:
- Skipping the Thicken Time: Not allowing the pudding to sit for 5 minutes can result in a runny consistency. Always let it thicken before adding other ingredients.
- Overmixing the Whipped Topping: If you overmix, the whipped topping may lose its light texture. Gently fold it into the pudding to maintain that airy quality.
- Using Warm Milk: Warm milk can cause the pudding mix to clump. Always use cold milk for smooth results.
- Forgetting to Chill: Serving immediately without chilling can affect flavor and texture. Allow your Dirt Cups to chill in the refrigerator until ready to serve.
- Neglecting Presentation: Not layering or decorating properly can make your Dirt Cups less appealing. Take time to layer and decorate each cup with crushed Oreos and gummy worms for a fun look.
Storage & Reheating Instructions
Refrigerator Storage
- Store in airtight containers for up to 3 days.
- Keep layers intact for best texture.
Freezing Dirt Cups
- Freeze in individual portions for up to 1 month.
- Use freezer-safe containers or wrap them tightly in plastic wrap.
Reheating Dirt Cups
- Oven: Not recommended, as they are best served chilled.
- Microwave: Use in short increments if needed; however, this may alter texture.
- Stovetop: Not recommended; best enjoyed cold directly from storage.
Frequently Asked Questions
What are Dirt Cups?
Dirt Cups are a fun dessert made with layers of chocolate pudding, crushed Oreos, and gummy worms, resembling dirt. They are perfect for parties and kids’ events!
Can I Customize My Dirt Cups?
Absolutely! You can customize your Dirt Cups by adding different toppings like crushed graham crackers or using different flavors of pudding.
How Long Do Dirt Cups Last?
Dirt Cups last about 3 days in the refrigerator when stored properly. For longer storage, consider freezing them.
Are There Vegan Options for Dirt Cups?
Yes! You can use plant-based pudding mix and non-dairy whipped topping to create vegan Dirt Cups that everyone can enjoy.
Final Thoughts
Dirt Cups are not only delicious but also incredibly versatile! This dessert is perfect for gatherings or just a fun treat at home. Feel free to customize them with your favorite toppings or pudding flavors to make them even more special. Give this delightful recipe a try—you won’t be disappointed!

Dirt Cups
Dirt Cups are a playful and delicious dessert that will bring joy to any gathering. With layers of rich chocolate pudding, crunchy crushed Oreos, and whimsical gummy worms, these cups resemble dirt while delivering a delightful mix of flavors and textures. Easy to assemble in just minutes, they make a perfect treat for children’s parties, Halloween festivities, or any fun occasion. Not only are they visually appealing, but they’re also customizable—feel free to switch out the gummy worms for your favorite candies or add fresh fruit on top for an added twist. Everyone, from kids to adults, will love digging into these charming cups!
- Total Time: 12 minute
- Yield: Serves 8
Ingredients
- 3.4 ounces instant chocolate pudding mix
- 2 cups cold milk
- 8 ounces whipped topping (thawed)
- 10–12 Oreo cookies (crushed)
- 32 gummy worms
Instructions
- In a medium bowl, combine cold milk with the chocolate pudding mix; whisk until well blended.
- Let the mixture sit for about 5 minutes to thicken.
- Gently fold in the thawed whipped topping until smooth.
- Spoon the pudding mixture into serving cups, filling halfway.
- Sprinkle crushed Oreos on top to create a 'dirt' layer.
- Garnish each cup with four gummy worms.
- Chill in the refrigerator until ready to serve.
- Prep Time: 10 minutes
- Cook Time: None
- Category: Dessert
- Method: No bake
- Cuisine: American
Nutrition
- Serving Size: 1 serving
- Calories: 290
- Sugar: 24g
- Sodium: 220mg
- Fat: 16g
- Saturated Fat: 8g
- Unsaturated Fat: 7g
- Trans Fat: 0g
- Carbohydrates: 34g
- Fiber: 1g
- Protein: 3g
- Cholesterol: 15mg
Keywords: Use cold milk for the best texture. Allow the pudding enough time to thicken before adding whipped topping. Customize your Dirt Cups by using different toppings like crushed graham crackers or various candies.