
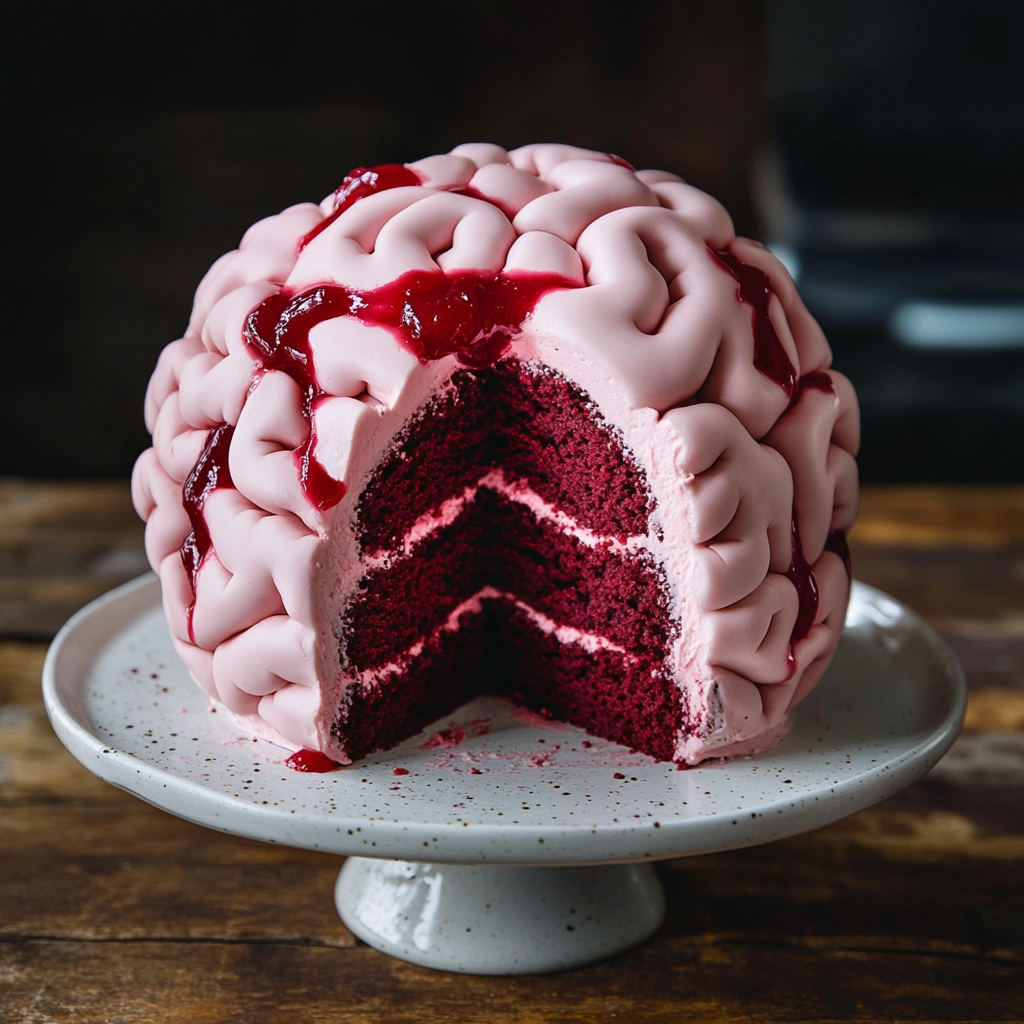
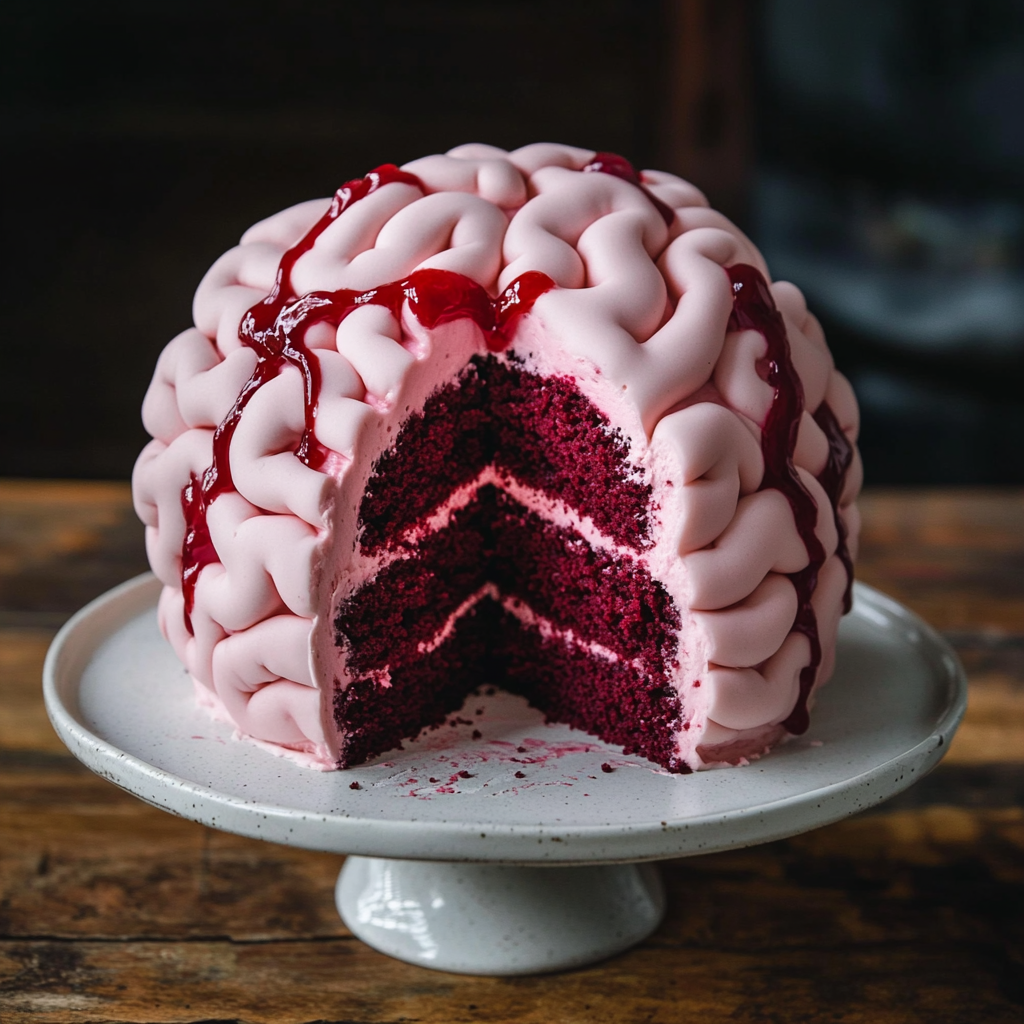
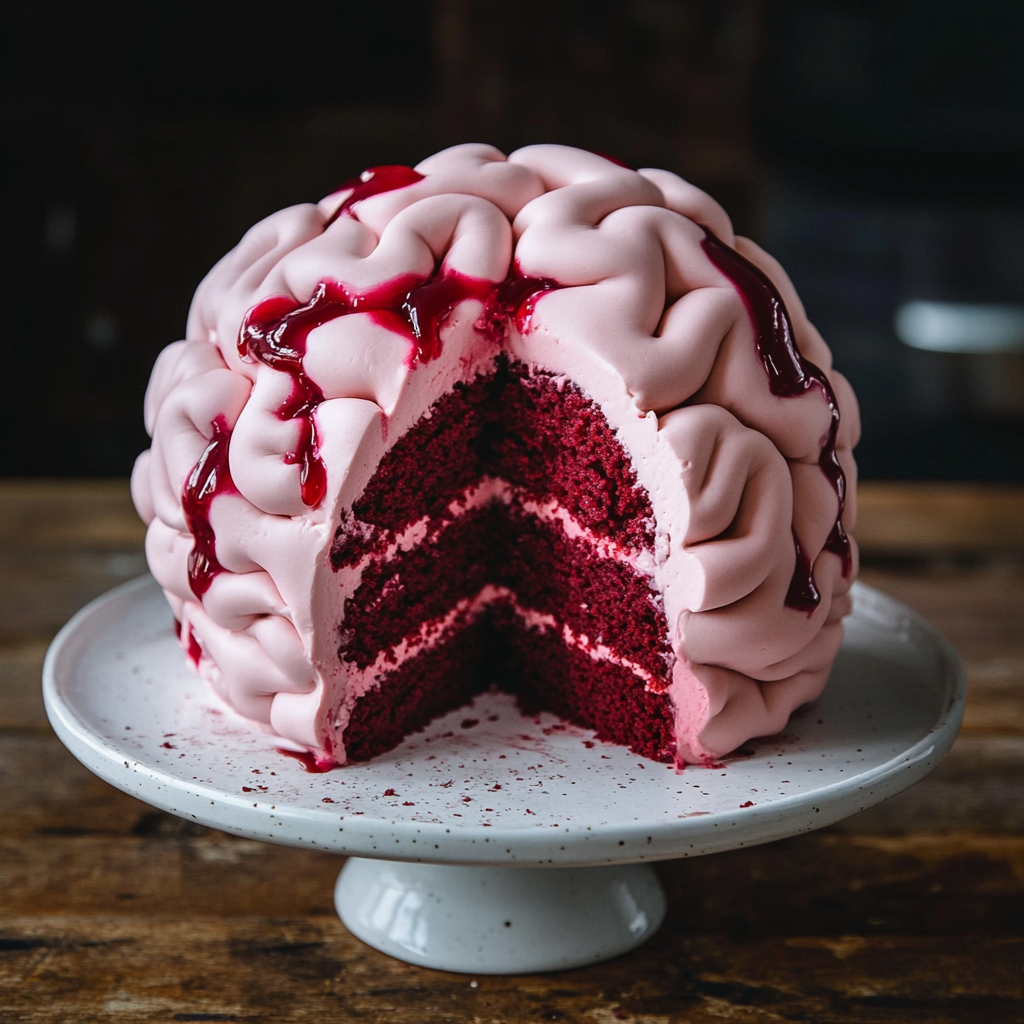
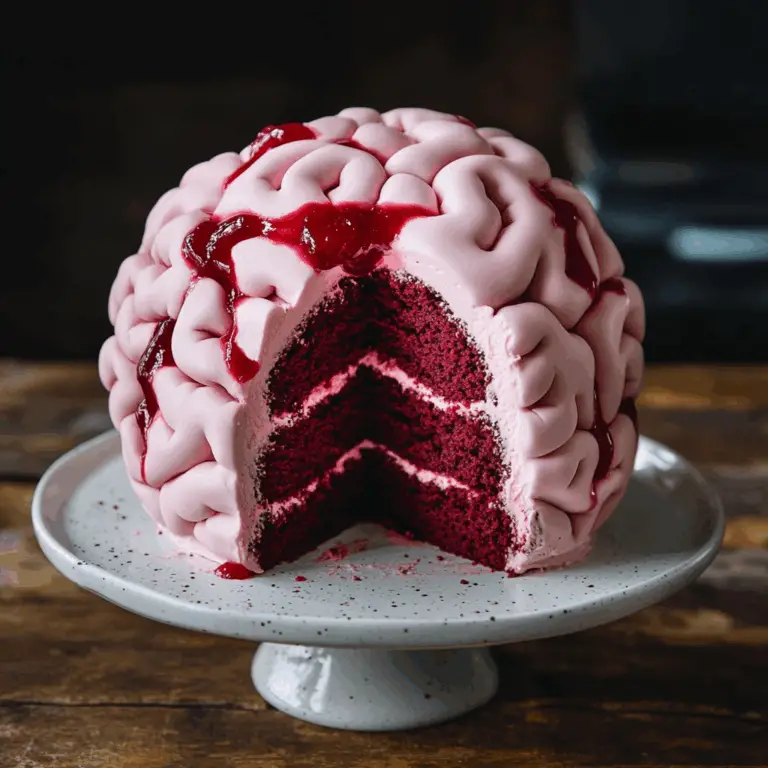
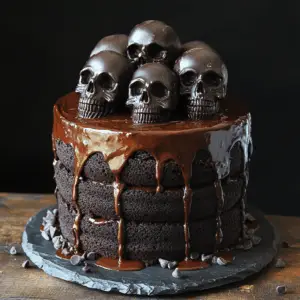
This Brain Cake is not just a dessert; it’s a conversation starter! Perfect for Halloween parties, spooky birthday celebrations, or any event where you want to impress your guests with a creative twist on the classic cake. With its moist red velvet layers, luscious pink buttercream, and raspberry jam blood, this cake looks both delicious and eerily appealing. It’s sure to be a hit among kids and adults alike!
Why You’ll Love This Recipe
- Visual Appeal: This cake is designed to look like a brain, making it perfect for Halloween or themed parties.
- Delicious Flavor: The combination of red velvet and raspberry jam offers a delightful taste that everyone will enjoy.
- Customizable Design: You can easily adjust the colors and decorations to fit different themes or occasions.
- Easy to Make: With simple ingredients and straightforward steps, even beginner bakers can create this showstopper.
- Large Servings: This recipe yields about 20 servings, making it perfect for gatherings.
Tools and Preparation
Before diving into this fun baking project, gather your tools and prepare your workspace.
Essential Tools and Equipment
- Mixing bowls
- Electric mixer
- Measuring cups and spoons
- Baking pans (round)
- Offset spatula
- Cooling rack
Importance of Each Tool
- Electric mixer: This tool ensures that your buttercream is smooth and fluffy without much effort.
- Baking pans: Using the right size pans helps achieve even baking for perfect cake layers.
- Offset spatula: Ideal for spreading frosting evenly on the cake, giving it a professional finish.

Ingredients
To make this stunning Brain Cake, gather the following ingredients:
For the Cake Layers
- 2 1/2 cups cake flour (300g)
- 2 Tbsp unsweetened cocoa powder, sifted (10g)
- 1 tsp baking soda (6g)
- 1/2 tsp fine salt (3g)
- 1/2 cup unsalted butter, room temperature (113g)
- 1 3/4 cups granulated sugar (350g)
- 2 large eggs, room temperature (112g)
- 1 1/4 cups buttermilk, room temperature (300g)
- 1/2 cup vegetable or canola oil (120g)
- 2 tsp vanilla extract or vanilla bean paste (8g)
- 1 tsp white vinegar (4g)
- 1 tsp red gel food coloring (or 1 Tbsp liquid food coloring)
For the Buttercream Frosting
- 1 1/2 cups unsalted butter, room temperature (339g)
- 1 cup full-fat cream cheese, room temperature (226g)
- 1 Tbsp vanilla extract or vanilla bean paste (12g)
- 1 tsp fine salt (6g)
- 7 cups powdered sugar (904g or a 2lb. bag)
- 3 Tbsp heavy whipping cream, room temperature (45g)
- Small squirt of red gel food coloring (or 1 tsp liquid food coloring)
For the Raspberry Jam Blood
- 1/2 cup seedless raspberry or strawberry jam
- 3 Tbsp water (45g)
How to Make Brain Cake
Step 1: Preheat the Oven
Preheat your oven to 350°F (175°C). Prepare your round baking pans by greasing them lightly with butter and lining the bottoms with parchment paper.
Step 2: Mix Dry Ingredients
In a mixing bowl, combine the cake flour, cocoa powder, baking soda, and salt. Whisk these dry ingredients together until they are well blended.
Step 3: Cream Butter and Sugar
In another bowl, use an electric mixer to cream together the unsalted butter and granulated sugar until light and fluffy. This usually takes about 3–5 minutes.
Step 4: Add Eggs and Wet Ingredients
Add the eggs one at a time to the creamed mixture. Mix thoroughly after each addition. Then incorporate buttermilk, oil, vanilla extract, white vinegar, and red gel food coloring. Mix until combined.
Step 5: Combine Dry and Wet Mixtures
Gradually add the dry ingredient mixture into the wet mixture. Stir until just combined; avoid overmixing to keep your cake tender.
Step 6: Bake
Divide the batter evenly between your prepared pans. Bake in the preheated oven for about 27 minutes or until a toothpick inserted in the center comes out clean. Allow cakes to cool in pans for about 10 minutes before transferring them to a cooling rack.
Step 7: Prepare Buttercream Frosting
While the cakes are cooling, beat together unsalted butter and cream cheese until smooth. Gradually add powdered sugar along with salt while mixing on low speed. Once combined, add heavy cream and mix again until fluffy. Add red gel food coloring as desired for a spooky effect.
Step 8: Assemble Your Cake
Once cooled completely, place one layer of cake on a serving platter. Spread a layer of raspberry jam on top followed by a layer of buttercream frosting. Repeat with remaining layers.
Step 9: Decorate
Use any leftover buttercream to create texture resembling brain matter on top of the cake using an offset spatula or piping bag.
Enjoy creating this delightful Brain Cake that’s sure to thrill everyone at your next gathering!
How to Serve Brain Cake
This spooky brain cake is a delightful centerpiece for any Halloween gathering. Here are some creative ways to serve it that will impress your guests and enhance the festive spirit.
Individual Slices
- Serve each slice on a decorative plate with a dollop of raspberry jam on the side for an extra touch of blood.
Cake Pops
- Transform leftover cake into fun cake pops by crumbling the cake, mixing it with buttercream, and dipping them in chocolate coating.
Mini Cupcakes
- Bake mini versions of the brain cake and top them with pink buttercream and a drizzle of raspberry jam for bite-sized treats.
Dessert Table Display
- Create an eye-catching dessert table featuring the brain cake alongside other Halloween-themed treats like ghost-shaped cookies and pumpkin cupcakes.
Themed Plates
- Use themed plates or napkins featuring skulls or bats to serve your brain cake, adding to the overall spooky theme.
How to Perfect Brain Cake
Creating the perfect brain cake involves attention to detail and a few helpful techniques. Here are some tips to ensure your cake is both delicious and visually stunning.
- Use room temperature ingredients: Ensuring that your butter, eggs, and buttermilk are at room temperature helps create a better texture in your cake.
- Sift dry ingredients: Sifting flour, cocoa powder, and baking soda together prevents lumps and promotes even mixing for a lighter cake.
- Don’t overmix: Mix just until combined when adding wet ingredients to dry. Overmixing can lead to a dense texture instead of a light, fluffy cake.
- Check for doneness: Use a toothpick inserted into the center of the cake; it should come out clean or with just a few crumbs attached for perfect results.
- Decorate creatively: When icing your brain cake, use a piping bag to create realistic textures that mimic the look of brains; this adds an impressive visual effect.
Best Side Dishes for Brain Cake
Pairing your brain cake with complementary side dishes enhances the overall dining experience. Here are some great options to consider:
- Spooky Salad: A mixed greens salad adorned with cherry tomatoes shaped like eyeballs (using olives) will add freshness to your dessert table.
- Pumpkin Soup: This creamy and savory soup brings warmth and seasonal flavor, making it an excellent contrast to the sweet brain cake.
- Cheesy Garlic Bread: Serve warm slices of cheesy garlic bread that guests can enjoy between bites of the rich dessert.
- Roasted Veggies: A colorful assortment of roasted vegetables provides a healthful balance to the sweetness of the brain cake.
- Crispy Potato Wedges: Seasoned potato wedges offer a satisfying crunch that pairs well with any sweet treat after dinner.
- Fruit Skewers: Fresh fruit skewers are not only refreshing but also add vibrant colors to your Halloween spread, balancing out indulgent sweets.
- Chocolate Mousse: A light chocolate mousse complements the rich flavors of red velvet while providing another layer of decadence.
- Popcorn Balls: These sweet treats can be shaped into fun designs or served as is for an easy-to-eat option alongside your spooky dessert.
Common Mistakes to Avoid
Many people make simple mistakes when preparing a Brain Cake. Here are some common pitfalls and how to steer clear of them.
- Ignoring room temperature ingredients: It’s essential for your butter, eggs, and buttermilk to be at room temperature. This ensures better mixing and a fluffier cake.
- Not measuring flour correctly: Spoon flour into your measuring cup and level it off instead of scooping directly from the bag. Scooping can lead to too much flour, making the cake dense.
- Overmixing the batter: Mix just until combined. Overmixing can result in a tough cake instead of light and airy layers.
- Using old baking soda: Always check the expiration date on your baking soda. If it’s old, it won’t provide the necessary lift for your cake.
- Skipping the cooling step: Allow your cake layers to cool completely before frosting. If you frost while warm, the buttercream will melt and slide off.
- Not tasting as you go: Always taste your batter and frosting. Adjust sweetness or flavorings before final assembly for the best results.
Storage & Reheating Instructions
Refrigerator Storage
- Store leftover Brain Cake in an airtight container.
- It can be kept in the refrigerator for up to 5 days.
Freezing Brain Cake
- Wrap individual slices tightly in plastic wrap or aluminum foil.
- Freeze for up to 3 months for optimum freshness.
Reheating Brain Cake
- Oven: Preheat the oven to 350°F (175°C). Place slices on a baking sheet and warm for about 10-15 minutes.
- Microwave: Heat each slice for about 20-30 seconds on medium power, checking frequently to avoid overheating.
- Stovetop: Use a non-stick skillet on low heat, covering with a lid for about 5 minutes until warmed through.
Frequently Asked Questions
Here are some commonly asked questions about making a Brain Cake.
How do I achieve the perfect red color for my Brain Cake?
To get that vibrant red hue, use high-quality red gel food coloring. Adjust according to your desired shade, adding more gradually until you reach perfection.
Can I make this Brain Cake gluten-free?
Yes! Substitute regular cake flour with a gluten-free blend designed for baking. Check that all other ingredients are also gluten-free.
What makes this Brain Cake suitable for Halloween?
The unique design mimics a brain, while its rich red velvet flavor paired with pink buttercream creates an eye-catching treat perfect for spooky celebrations.
How do I decorate my Brain Cake?
You can use additional raspberry jam to create blood drips or pipe extra buttercream details around it for added effect. Get creative with decoration!
Can I use different flavors instead of red velvet?
Absolutely! Feel free to experiment with chocolate or vanilla cake as an alternative base flavor while keeping the theme intact.
How long does it take to make this Brain Cake?
From prep to bake time, expect about 77 minutes in total before decorating and serving your delightful creation.
Final Thoughts
This Brain Cake is not only a fun centerpiece for any Halloween celebration but also offers versatility with flavors and decorations. Try customizing it with different color schemes or flavors that suit your taste preferences!
Brain Cake
Create a spooky yet delicious Brain Cake that’s perfect for Halloween! This show-stopping dessert features moist red velvet layers, luscious pink buttercream frosting, and a raspberry jam ‘blood’ topping that will impress guests of all ages. Whether it’s for a Halloween party or a themed birthday celebration, this creative cake is both visually striking and delightfully tasty. With straightforward instructions and easily customizable decorations, even beginner bakers can master this fun recipe. Get ready to elevate your festive gatherings with this eye-catching treat that’s sure to be the highlight of the dessert table!
- Total Time: 57 minutes
- Yield: Approximately 20 servings 1x
Ingredients
- 2 1/2 cups cake flour
- 2 Tbsp unsweetened cocoa powder, sifted
- 1 tsp baking soda
- 1/2 tsp fine salt
- 1/2 cup unsalted butter, room temperature
- 1 3/4 cups granulated sugar
- 2 large eggs, room temperature
- 1 1/4 cups buttermilk, room temperature
- 1/2 cup vegetable or canola oil
- 2 tsp vanilla extract or vanilla bean paste
- 1 tsp white vinegar
- 1 tsp red gel food coloring
- 1 1/2 cups unsalted butter, room temperature (for frosting)
- 1 cup full-fat cream cheese, room temperature
- 1 Tbsp vanilla extract or vanilla bean paste (for frosting)
- 1 tsp fine salt (for frosting)
- 7 cups powdered sugar
- 3 Tbsp heavy whipping cream, room temperature
- Small squirt of red gel food coloring (for frosting)
- 1/2 cup seedless raspberry or strawberry jam
- 3 Tbsp water
Instructions
- Preheat your oven to 350°F (175°C) and prepare round baking pans by greasing them lightly with butter and lining the bottoms with parchment paper.
- In a mixing bowl, combine the cake flour, cocoa powder, baking soda, and salt. Whisk these dry ingredients together until they are well blended.
- In another bowl, use an electric mixer to cream together the unsalted butter and granulated sugar until light and fluffy.
- Add the eggs one at a time to the creamed mixture. Mix thoroughly after each addition. Then incorporate buttermilk, oil, vanilla extract, white vinegar, and red gel food coloring. Mix until combined.
- Gradually add the dry ingredient mixture into the wet mixture. Stir until just combined; avoid overmixing.
- Divide the batter evenly between your prepared pans. Bake in the preheated oven for about 27 minutes or until a toothpick inserted in the center comes out clean. Allow cakes to cool in pans for about 10 minutes before transferring them to a cooling rack.
- While the cakes are cooling, beat together unsalted butter and cream cheese until smooth. Gradually add powdered sugar along with salt while mixing on low speed. Once combined, add heavy cream and mix again until fluffy. Add red gel food coloring as desired.
- Once cooled completely, place one layer of cake on a serving platter. Spread a layer of raspberry jam on top followed by a layer of buttercream frosting. Repeat with remaining layers.
- Use any leftover buttercream to create texture resembling brain matter on top of the cake.
- Prep Time: 30 minutes
- Cook Time: 27 minutes
- Category: Dessert
- Method: Baking
- Cuisine: American
Nutrition
- Serving Size: 1 serving
- Calories: 410
- Sugar: 46g
- Sodium: 250mg
- Fat: 18g
- Saturated Fat: 11g
- Unsaturated Fat: 6g
- Trans Fat: 0g
- Carbohydrates: 60g
- Fiber: 0g
- Protein: 4g
- Cholesterol: 50mg
Keywords: For extra visual appeal, use piping techniques to create realistic brain textures on top of the cake. Feel free to swap in different fruit preserves for the filling for a unique twist.


My partner and I stumbled over here coming from a different page and thought I might check things out. I like what I see so i am just following you. Look forward to finding out about your web page yet again.